woensdag 8 januari 2014

New Release: the Majestic Morning Collection!

Finally it's there the first new collection of 2014:   the Majestic Morning Collection!

so much fun again to work with the beautiful materials :)))

For a very limited time Heartfelt will be be offering a card kit with this collection. See it Here

here's what I made for this week :))


Project Instructions:
Other Products: Brown Card stock (CS), vintage photo distress ink, hot glue gun, lace,

Instructions: Start by making a small box that fit the Post-it notes. Cut the cardstock 6" x 4", and score 1/2" in on all four sides. I used the Majestic Morning Paper Collection for both inside and outside the box. Patterned paper strips - 3/8" x 4 7/8" (x4), & 3/8" x 2 7/8" (x4). Inside the box I fasten the short paper stripes. Then make the box ready before adding the last paper stripes using the Majestic Morning paper Collection. This way it will cover up the tabs on the box. For the card - Start with a 12" x 6" cardstock. Find the middle of the cardstock, and score a 1/4" line out from the middle to both sides. This will make a 1/2" back on the card, and your card will stay flat when you close it. Now score a line in the middle of one of the large areas, and the shape of the easel is finished. Decorate all areas on the inside with patterned paper and do the same on the outside. Now it is time to make and decorate the front. My front is a 12,5 cm x 12,5 cm square(brown CS), but you can use any size and shape you like. Choose one of the designs you want to use and cut one of the beautiful Die Cuts and put lace around it. I use tape only on the lower part, and fasten the front to the easel. I use double sided tape to fasten the Post-it notes to the box, and the box to the easel.

NOTE: Since I could not find a post-it block with the right size, I used a small note pad book and adjusted the size of the box. Here is the original tutorial.


Project Instructions:
Other products: Some kind of triptych, spiced marmelade distress ink, hot glue gun, flatback pearls, lace, pearlen pen, black memento ink, HCD 702 Butterfly border die (disc.)

Instructions: This time I altered a MDF triptych using the beautiful Majestic Morning Paper Collection. As usual I inked all the edges of the 3 MDF parts with spiced marmelade distress ink. Then with a pencil I drew all the shapes and cut them out and also inked the edges of the paper. Cut from the Decorative Chateau Gate Die 3 windows and cut off the swirley top and ink the edges and use them on the left side of your triptych. Use the side swirls for the right side of the triptych. Cut from the Decorative Butterfly-Border Die the corner 1 time. Choose some Beautiful matching Die Cuts from the paper collection and place them anywhere you want. From the Beautiful You PreCut Set I used the 2 text stamps. Cut and Emboss flowers from the Majestic Blooms Die. It does not show very well on the photos but I sprayed the flowers first with glimmer mist and then layered the flowers. Decorate the triptych in any way you like.

woensdag 1 januari 2014

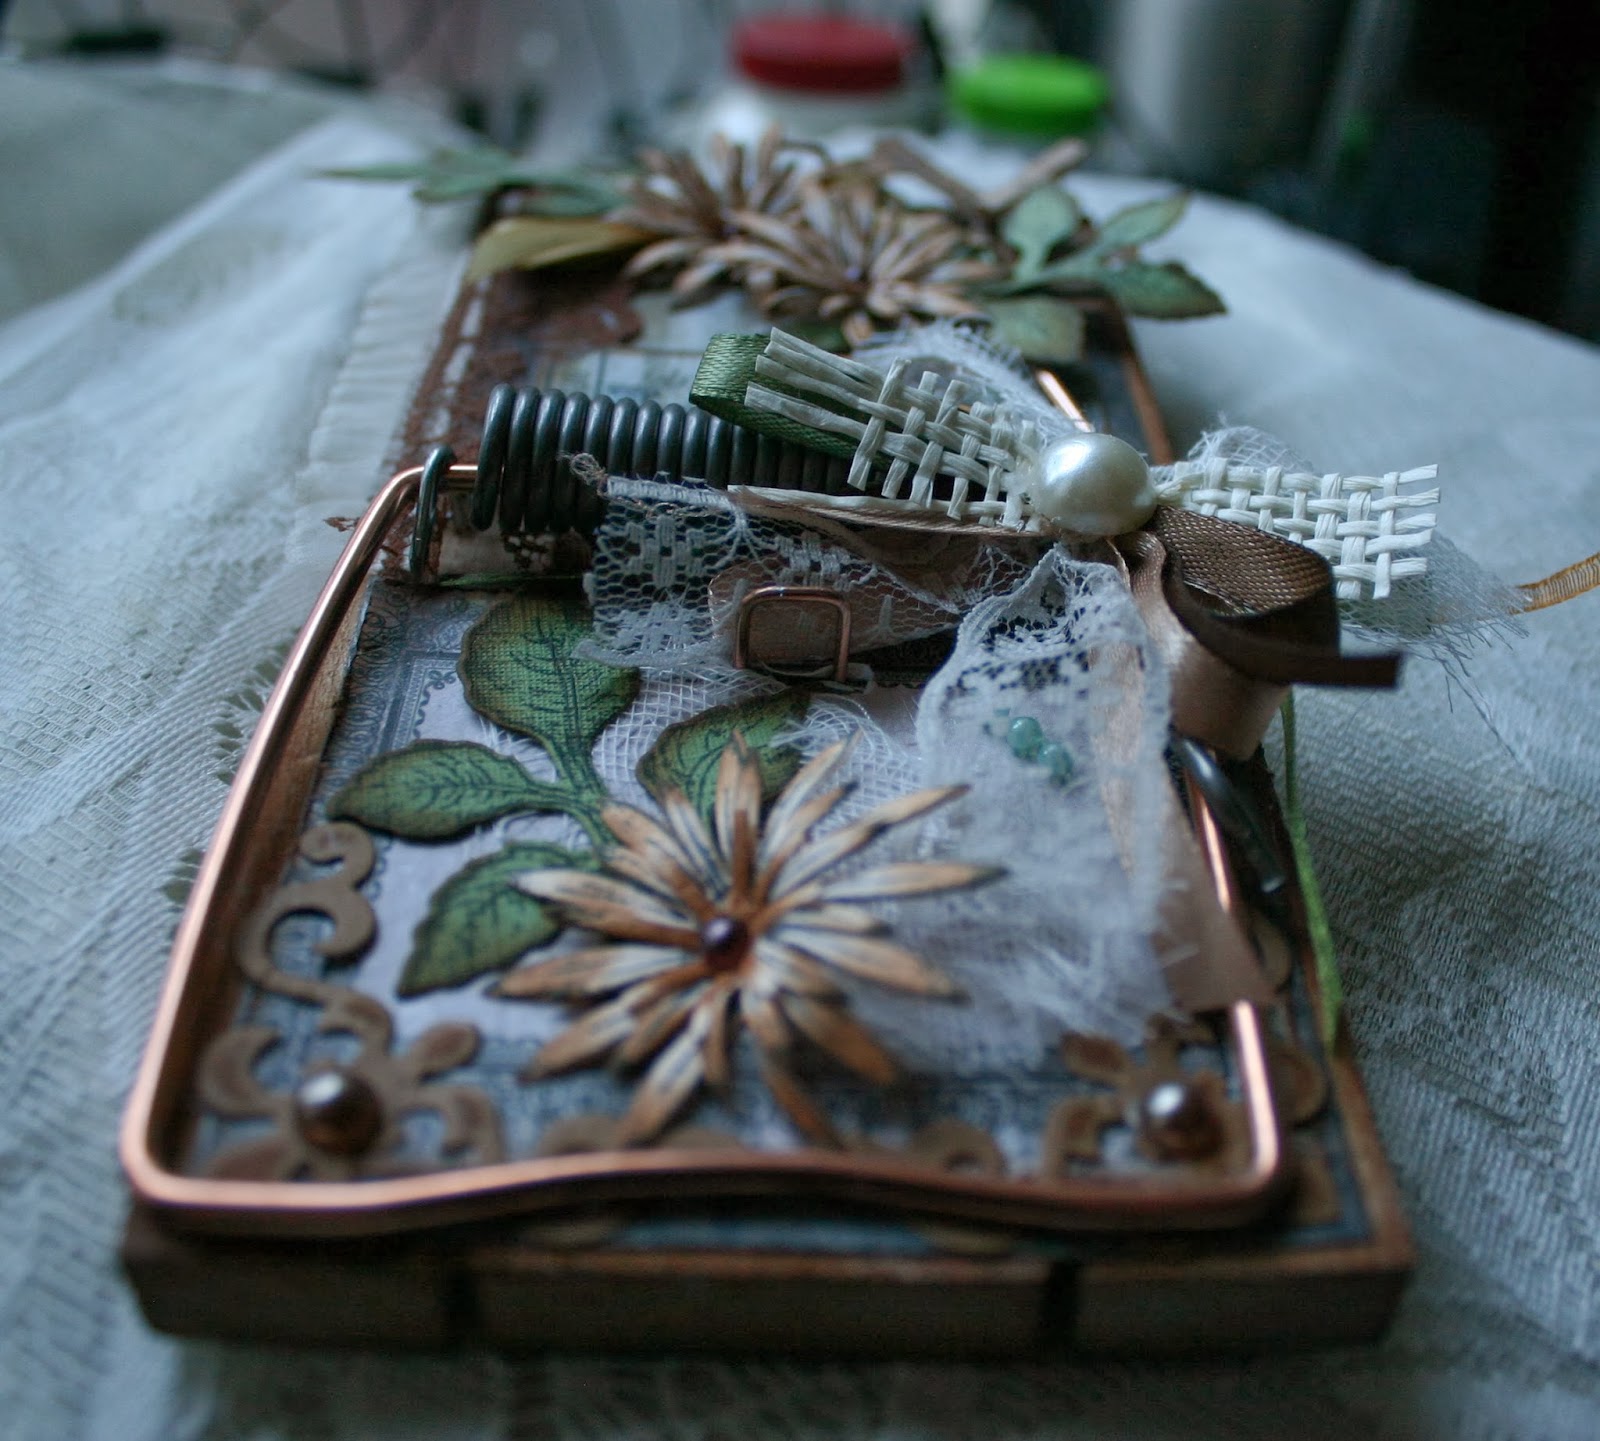
Heartfelt Inspirations................Altered Mousetrap

I know...........the title says mousetrap but actually I used a rat trap cause it's bigger 
and easier to work with :P


Products Used:
HCDP1 238 Floral Key Paper Collection
HCD 736 Classic Leaf Die
HCPC 3546 Classic Leaf PreCut Set
HCPC 3545 Open Leaf PreCut Set
HCPC 3494 Delicate Asters PreCut Set
HCD 726 Delicate Asters Die

Project Instructions:
Other products: Vintage photo distress ink, hot glue gun, lace, glue, flatback pearls, 3dfoam glue pads, mini bowdabra

Instructions: This time no card but something totally different... an altered rat trap. Ofcourse you can also use a mousetrap but this one is larger thus easier to work with. Before I added the paper to the trap I inked the edges first of course with vintage photo distress ink. Then I choose some lovely papers from the Floral Key Paper Collection. I used one for the background and added one layer on top. Once you glued the paper you can decorate to your own needs:) The bow was made with different materials using the mini bowdabra. For the flowers I cut and embossed the cute Delicate Asters Die.


zondag 29 december 2013

Birthday card on request

My mom asked me to make a Birthday Card for some one who's turning 80 :)
Ofcourse I couldn't resist so here's the result of the card:


donderdag 26 december 2013

Heartfelt Inspirations day again :))


Project Instructions:
Other products: Brown and green Card stock (CS), vintage photo distress ink, hot glue gun, lace, black memento ink

Instructions: This time I followed the wonderful tutorial by Marisa Job. 
You can find the tutorial here
Only I made the pocket card on a card (green CS) and I decorated the inside of the card using the Vintage Floret Paper Collection.

woensdag 18 december 2013

Wednesday again.............time really does fly :)

This week I made 2 cards for the Heartfelt Creations Blog. I am just sooooooooo in love with their designpapers.........


Products Used:
HCDP1 238 Floral Key Paper Collection
HCD 722 Tattered Blossoms Die
HCPC 3468 Tattered Blossoms PreCut Set
HCPC 3502 Mini Vintage Floret PreCut Set

Project Instructions:
Other products: Brown cs, vintage photo distress ink, hot glue gun, lace, glue, bead, pearlstring, 3dfoam glue pads

Instructions: Click here to view larger image of this project. Score an 11 x 8 1/2 piece of cardstock at 2 3/4, 5 1/2, & 8 1/4 and ink all the edges with vintage photo distress ink. The center fold is the mountain & the other two folds are valleys. Use the spellbinders label one die, lay it half-way on your paper to cut out & create the screen "legs." Cut matching pieces of paper you like from the Floral Key Paper Collection and place it on front and on the back. Use a border punch or some nice lace to create the top of the screen. Cut and emboss several flowers from the Tattered Blossoms Die and create a flower. I used a shiny bead for the center of the flower. Cut the 4 cute little stamps and the text cherish your moment from the beautiful Floral Key Paper Collection and place them on your card. Then, decorate


Products Used:
HCDP1 226 Delicate Asters Paper Collection
HCD 722 Tattered Blossoms Die
HCPC 3468 Tattered Blossoms PreCut Set


Project Instructions:
Other products: Brown Card stock (CS), dusty concord distress ink, hot glue gun, pearlen pen, bandage, black memento ink, lace organza ribbon, rope, buttons, double sided tape

Instructions: For folding the card please follow the photo instructions in the word document. You need a A4 size to create this card. Before you adhere the card please choose some nice papers from the Delicate Asters Paper Collection first and make them fit to the corners front and back. Before I glued the paper I cut some lace first and put that under the papers and then glued everything.

For the back I choose I nice die cut from the Delicate Asters Paper Collection and place it in the middle of the back of the card and folded one corner. Please do not forget to ink all your edges first. For the front of the card I made 2 tags and also used matching paper from the Delicate Asters Paper Collection and decorated the labels with a button, small piece of rope and organza ribbon. I rolled up to small pieces of paper and glued them on the front.for the die cut with text I used 3d foam gluepads. Decorate with a created flower from the Tattered Blossoms Die add some leaves and you are done.

Thank you for visiting again! :)))

woensdag 11 december 2013

DT time again :))

I have been a little busy this week so only made 1 card for today.Hope you like it :)) Wish you all a wonderfull day!


Products Used:
HCD 741 Burnished Key Die
HCPC 3569 Burnished Key PreCut Set
HCD 722 Tattered Blossoms Die
HCPC 3468 Tattered Blossoms PreCut Set
HCPC 3502 Mini Vintage Floret PreCut Set
HCDP1 233 Sun Kissed Paper Collection
209503 Floral Ovals
HCPC 3354 Classic Message PreCut Set
HCD 702 Decorative Butterfly-Border Die

Project Instructions:
Other products: Brown cs, vintage photo distress ink, hot glue gun, flatback pearls, lace, buttons, feathers, ribbon, glue, beads, keycharm

Multifold For You Instructions: Cut a piece of brown cardstock of 15 cm x 27 cm. Score at 4, 10 and 16 cm. Fold the card as you see on my photo. Ink the edges with vintage photo distress ink. Choose one of the beautiful papers from the Sun Kissed Paper Collection and cut matching pieces for the front and the back of the card. Adhere all the papers to your base card. Cut and emboss several flowers from the Tattered Blossoms Die. I used the left overs from the Sun Kissed Paper Collection. Ink the flowers with the Tattered Blossoms PreCut Set and Mini Vintage Floret PreCut Set. Cut the second large oval from the Floral Ovals die and place any text you like. I used the Classic Message PreCut Set. Ink the edges, cut a small piece of bandage,lay it underneath and adhere to the right of the card. Cut the corner from the Decorative Butterfly-Border Die and place at the bottom of your floral die. Decorate with a tiny ribbon and some flatback pearls. For the back of the card I used one of the beautiful die cuts from the Sun Kissed Paper Collection. I also hot glued a tiny magnet to "close" the card. Decorate the rest of your card with some nice lace on top and some flowers. I used beads for the center of the flowers. I also used some of the dies from the Burnished Key Die to decorate the inside of the card.

woensdag 4 december 2013

It's Wednesday again, time for Heartfelt Creations :)


Project Instructions:
Other products: dark brown, brown and green Card stock (CS), vintage photo distress ink, hot glue gun, flatback pearls, lace, figure scissor, black memento ink

Instructions: Cut a 27 x 13,5  cm piece of brown cardstock and fold it to make a 13,5 x 13,5 cm card. Sponge the edges with vintage photo distress ink. Cut a piece of green cardstock 12,5 x 12, 5 cm, ink the edges and place it in the center. Choose a piece of nice paper from the Sun Kissed Paper Collection and cut the edges with a figure scissor. Ink the edges and place on the green CS. Cut from the Floral Ovals the second large oval also out of the Sun Kissed Paper Collection and ink the edges. Draw and cut the oval and use one of the stamps from the Classic Message PreCut Set. Adhere the inner oval to the Floral oval. Cut a piece of lace and attach it to the back of the Floral Oval and adhere it to your card. Cut and emboss 4 of the smallest flower and ink it with the Mini Vintage Floret PreCut Set, I used the vintage photo ink this time. Cut and emboss 2 Classic Leaf Dies. From one of the dies cut of some leaves. Place 3 of the flowers and the leaves under your Floral Oval and add a tiny flatbackpearl in the center of the flowers. For the inside of the card I cut a darkbrown piece of CS (13 x 6,5 cm) and also cut a matching piece from the Sun Kissed Paper Collection. I cut the top edge with the figure scissor and inked the edge. Only glue the bottom and the sides so you can put the tag in it. The tag was also cut from the Sun Kissed Paper Collection. I added 3 colors of organza ribbon and placed 1 one of the flowers with some leaves on the tag.


Project Instructions:
Other Products Used: Dark brown, brown and green Card stock (CS), vintage photo distress ink, hot glue gun, flatback pearl, bandage, black memento ink

Instructions: Cut a 29 x 12 cm piece of brown cardstock and fold it to make a 14,5 x 12 cm card. Sponge the edges with vintage photo distress ink. Cut a piece of green cardstock 14 x 11 cm,ink the edges and place it in the center. Cut a piece of dark brown cardstock 13,5 x 10,5 cm,ink the edges and place it in the center. Choose a piece of nice paper from the Vintage Floret Paper Collection and distress the edges with a 3d scissor. Ink the edges and place on the dark brown CS. Choose another piece of nice paper from the Vintage Floret Paper Collection and cut a piece of 8,5 x 8,5 cm and cut the edges with a fiure scissor and ink the edges. Cut from the Decorative Chateau Gate Die the doorway and ink with the Grand Portal PreCut Set and ink the egdes. Cut the small leaves 6 times ( 4 green ones and 2 brown ones) and ink the edges. Cut the window and cut off the swirly edges and place them under your vintage floret paper on both sides. Cut a piece of paper for the inner of the door. I have inked the paper first with brown and green distress ink then added my stamp from the Melodious Songbird PreCut Set. Add some bandage under the door and adhere everything. Cut and emboss 10 of the smallest flowers and ink it with the Mini Vintage Floret PreCut Set and create 2 flowers of 5 layers. For the inside of the crad I cut a dark brown CS of 14 x 11 cm and picked a die cut from the Vintage Floret Paper Collection.