Posts tonen met het label altered. Alle posts tonen

donderdag 2 oktober 2014

New Steampunk project: altered lantern :))

about 2 weeks ago I got this old wooden rusty lantern from a friend and the minute I saw it I knew what to do with it :))  create a steampunk lantern so here's the result :)


woensdag 17 september 2014

Another Sunny DT project for Heartfelt Creations this week :))

I had a lot of fun creating this easel card :D


Project Instructions:
Sunflower Birthday Presents Card

Other Products: Vintage photo distress ink, brown cs, glue, hot glue gun, black memento ink, bandage, lace, rhinestones, pearlstring, ribbon, emboss and frantage powder, heat gun, 3d foam pads.

Instructions: This time I have created a lovely "presents card". The idea came from this Dutch site here. I know the sizes are in centimeters, but you can save the templates to your computer and just print them out in any size you want. It is nothing more than a basic easel card. I made the easel cards from brown cardstock and decorated with the beautiful Classic Sunflower Collection papers. The little presents were also made from brown cardstock and decorated with the design paper. I have glued the present that is on top of the card otherwise it might fall off:) and keep in mind you cannot fold this card.

Once you have adhered the design paper, you can start decorating your card, glue the presents where ever you want them. I used some die cuts and adhered them with tiny foam pads to create some depth. The little butterfly on the right has been cut out from the design paper. On the yellow sunflower I used a little bit of viva 3d paint stamp (hey I just bought it last week so I am carefully starting to play with it:)).

woensdag 10 september 2014

Heartfelt Creations: the new Classic Sunflower Collection

The new Sunflower Collection is here from Heartfelt Creations :)) 


Project Instructions:
Sending You Sunshine
Other Products: Vintage photo distress ink, yellow and brown cs, glue, hot glue gun, black memento ink, bandage, lace, rhinestones trim, pearl brad, pearls.

Instructions: Create a base card 5" x 9" from yellow cardstock and ink the edges. Cut a smaller piece of brown CS and ink the edges. Cut another smaller piece of die cut from the Classic Sunflower Collection and ink the edges. I love working with layers so I cut 4 pieces from the Sunflower collection to use on the front of the card. Cut some tiny flowers from the Classic Sunflower Die and ink them with the Classic Sunflower PreCut Set. For the leaves I used the swirlys from the cut, mat and create collection. Now that you have all pieces ready you can adhere everything :)


Project Instructions:
Other Products: Vintage photo distress ink, glue, hot glue gun, black memento ink, bandage, lace, ribbon, dewdrops, flatback pearls string, rhinestones trim, Spellbinders Butterfly Reflections Die.

Instructions: Another altered project this week, a beautiful mdf birdhouse. This birdhouse is a package of 7 parts you have to put together yourself. Before placing all the parts in place you have to cut out the design paper first at the right sizes for all the panels. Once you have glued all the paper you can click all the parts together. Sunflower Blooming BirdhouseFor decorating this birdhouse I used lace, flatback pearls and rhinestones for the sparkley effect around the whole :) Die cut several flowers from the Classic Sunflower Die and create some flowers. For the center of the flowers I used dewdrops. The swirls are from the Cut, mat and create collection. I also die cut 2 butterflies from the Spellbinders S3 Dies and placed them on the roof.

zondag 7 september 2014

“Sept IARDC”

Wit this altered steampunk coffeemill I am joining the I Am Roses challenge with this month's theme: steampunk :)))  one of my favorites  :D


zondag 17 augustus 2014

Some new altered projects I created :))

so now and then I also have time to alter some great stuff.the last few weeks I have been busy altering an old coffeemill, wooden shoes and a cute little clock :))


woensdag 13 augustus 2014

Showing the New Festive Christmas Collection :))

A new release again at Heartfelt Creations: the Festive Christmas Collection.Such a beautiful collection again to get you in the right mood for Christmas  :D

 Products Used:
Festive Christmas Paper Collection
Arianna Lace Die
Banner and Trees Die
Cut Mat Create 1B Die
Christmas Poinsettia PreCut Set
Layered Poinsettia Shapeabilities

Project Instructions:
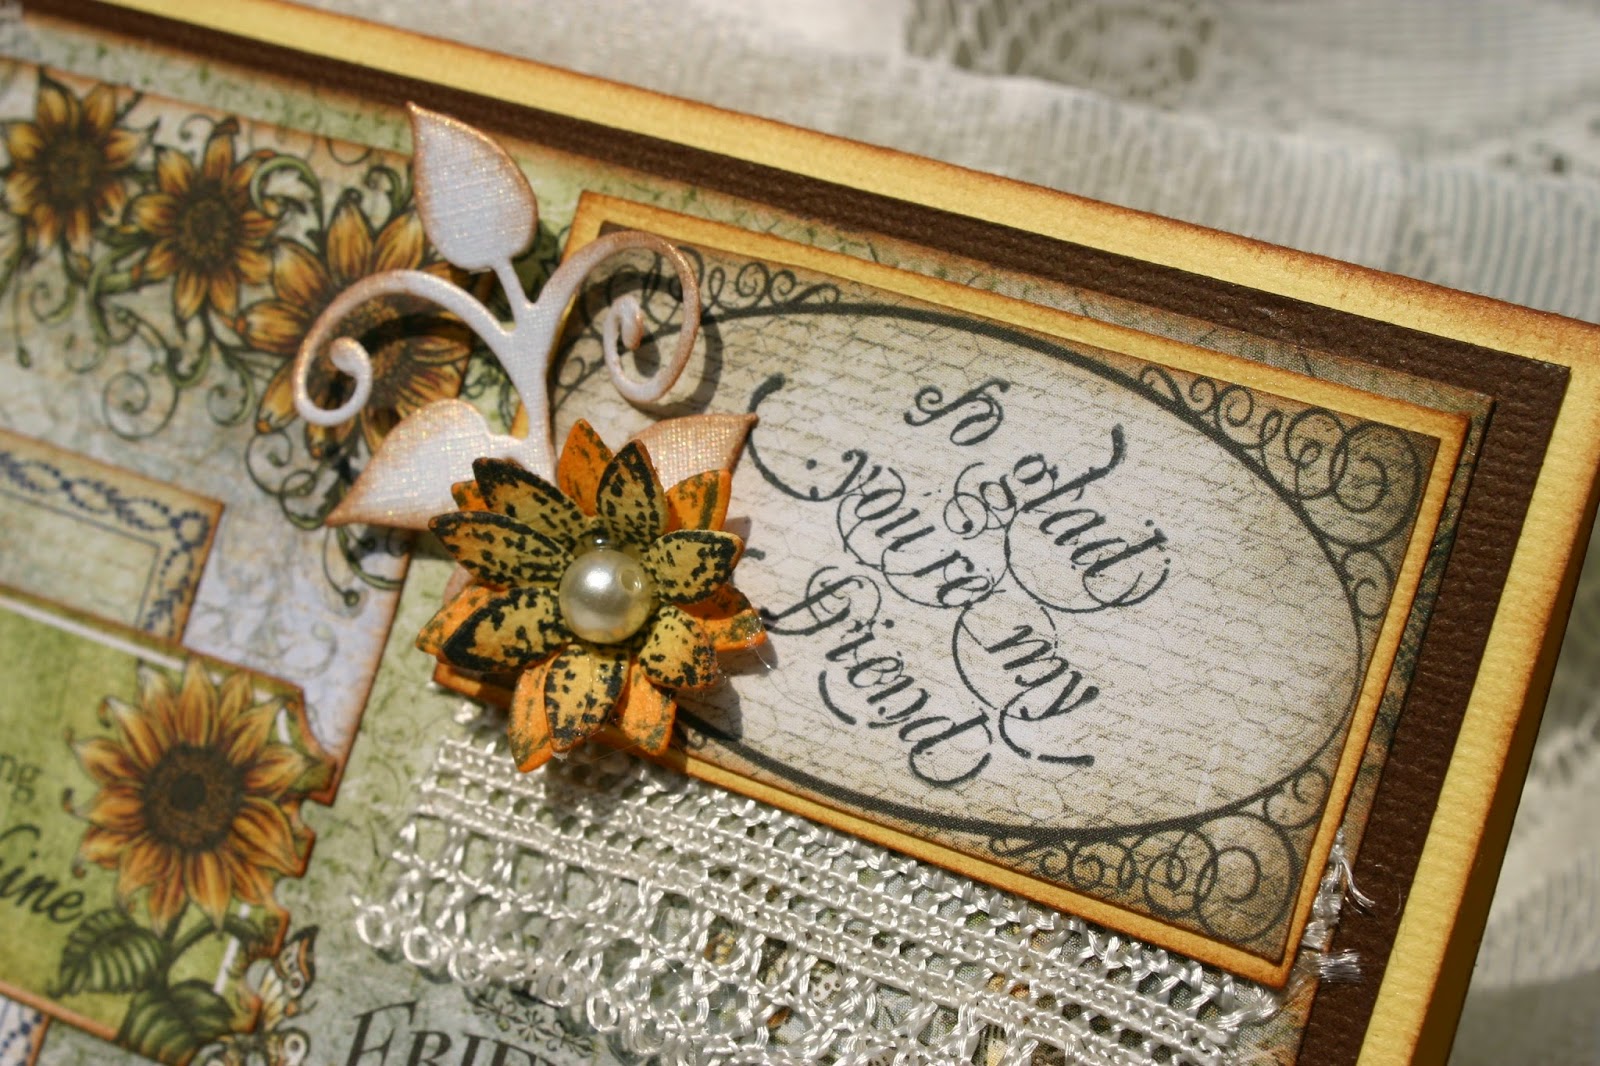
Other Products: Vintage photo distress ink, brown and red cardstock, glue, hot glue gun, black memento ink, lace, flatback pearls, 3d foam pads, tule, ribbon, bell charm.

Instructions: Create a base card 5" x 9" from brown cardstock and ink the edges. Cut a smaller piece of red CS and ink the edges. Choose a nice die cut from the Festive Christmas Paper Collection and ink the edges. Die cut and ink some flowers from the Layered Poinsettia Shapeabilities die. Die cut some swirleys from the Arianna Blooms Lace Die. Choose some text die cuts from the Festive Christmas Paper Collection and ink the edges. For the Christmas tree and the happy holidays diecut I used the foam pads to create some depth:) Now you can glue all the layers and decorate your card :)                                              


Project Instructions:
Other Products: Vintage photo distress ink, brown, green and red cardstock, glue, hot glue gun, black memento ink, lace, pearl string.

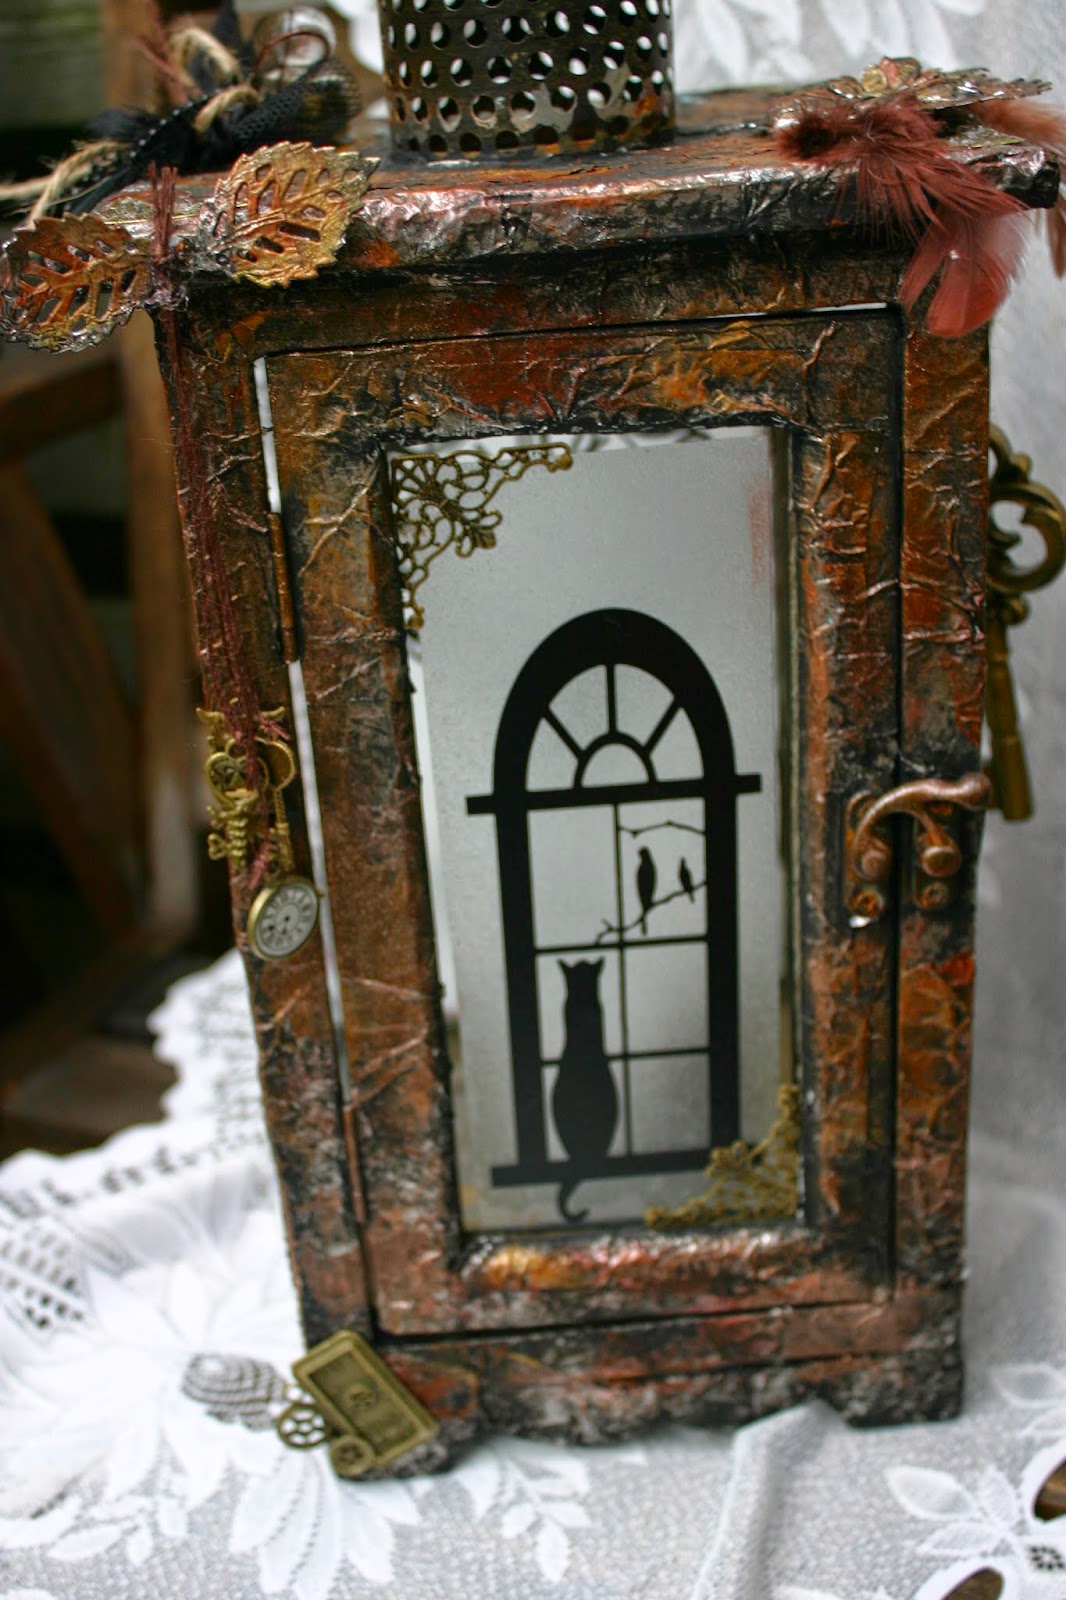
Wonderful Christmas Shadow Box

Instructions: This project is an altered mdf Christmas “shadowbox”. We have this store in the Netherlands that is called “Action” and they always have the most wonderful stuff for low prices, it really is one of my favorite stores :)) So they also had this cute little shadowboxes you need to put together yourself. Before putting all the parts together I cut the design paper first at the right sizes of course for the inside and outside. Once glued I put all the pieces together and inked as always the edges of course:)

For decorating the shadowbox I used some cute little Christmas thingys that I still had. Also glued some fake snow at the inside. I used some die cuts from the Festive Christmas Paper Collection and die cut and inked several flowers and leafy swirls from the Layered Poinsettia Shapeabilities and the Ornamental Add On Die.


woensdag 23 juli 2014

New Inspirational Wednesday again with Heartfelt Creations


Products Used:
Cut Mat Create 1A Die
Cut Mat Create 1B Die
Cut Mat Create 2A Die
Cut Mat Create 2B Die
Cut Mat Create Paper Collection
Summer Glory PreCut Set
Summer Song PreCut Set
Vines and Blooms PreCut Set
Birds and Blooms PreCut Set
Everyday Blooms PreCut Set
Classic Rose PreCut Set
Arianna Blooms PreCut Set
Arianna Blooms Die
Arianna Blooms Bouquet PreCut Set
Bella Rose Die
Bella Rose Leaves PreCut Set
Arianna Lace Die
Paper Blossoms Molding Mat
Paper Blossoms Tool Kit
Clock Hands


Project Instructions:
Other Products: Vintage photo distress ink, glue, hot glue gun, black memento ink, bandage, lace, ribbon, halfflatback pearls string, acrylic paint.

Instructions: For a larger picture of the front click here. Another altered project this week, a cute mdf clock :) This time something simple: altering a mdf clock. Instead of using a real Quartz Clock Mechanism I used the junkyyeard findings. I love the vintage style of these trinkets:) Start with choosing the design paper you wish to use from the Cut Mat and Create Paper Collection and cut the paper to fit all the clock elements. Cut some die cuts you wish to use and cut several flowers and swirls in from the Cut Mat and Create Collection die. Ink them in different colors that will match your chosen design paper. I also used one of the arianna lace dies to put behind one of the flowers :) The mdf clock plate was painted with acrylic paint, color: sugar. I also decorated the back of the clock so it will not look bored :) Once you have all your pieces together and cut out you can start decorating your clock.

thank you for visiting my blog again :)

woensdag 16 juli 2014

New Heartfelt Creations Inspiration :)


Products Used:
Cut Mat Create 1A Die
Cut Mat Create 1B Die
Cut Mat Create 2A Die
Cut Mat Create 2B Die
Cut Mat Create Paper Collection
Summer Glory PreCut Set
Summer Song PreCut Set
Vines and Blooms PreCut Set
Birds and Blooms PreCut Set
Everyday Blooms PreCut Set
Classic Rose PreCut Set
Arianna Blooms PreCut Set
Arianna Blooms Die
Arianna Blooms Bouquet PreCut Set
Bella Rose Die
Bella Rose Leaves PreCut Set
Arianna Lace Die
Paper Blossoms Molding Mat
Paper Blossoms Tool Kit


Other Products: Victorian velvet distress ink, tumbled glass distress ink, vintage photo distress ink, chipped sapphire distress ink, glue, hot glue gun, black memento ink, bandage, flatback pearls, zipper, handmade headpin, embellishments, acrylic paint.

Instructions: This time I decided to alter a cigar box :)) of course it will be stuffed with some sweets for the HC staff :P I painted the box first with acrylic paint and sprayed it with blue dysolusions spray, the inner box was also painted but no spray used. Then it is time to cut matching pieces from the Cut Mat and Create Paper Collection. As usual I inked all the edges first (also from the cigar box) I decorated the outside and inside of the box with the paper collection, cut a lot of flowers from the Arianna Blooms Dies and cut some decorative dies from the Cut Mat and Create Dies collection. For decoration I also used a small zipper and created a headpin. For the inside of the box I used lace for the inner edges.