Posts tonen met het label steampunk. Alle posts tonen

donderdag 7 mei 2020

Een knuffel in een papiertje

Hallo allemaal :)

Vandaag heb ik een stoere maar ook lieve kaart voor jullie :)
ik heb dit keer als basis de Dutch Doobadoo Card Art Mini album cirkels A4 470.713.740
gebruikt maar heb alleen de cirkels op een iets andere plek gemaakt.


de steampunk stencils van Joy!Crafts heb ik bewerkt met zwarte embosspoeder

In de cirkels heb ik er schudbolletjes van gemaakt


het zwarte embosspoeder is echt geweldig voor de gear stencils en het glittert geweldig :)


met de nieuwe bannerset en clearstempelset deze leuke tekst neer gezet.


Dankjewel voor je bezoekje en tot de volgende x :)


gebruikte materialen:
6002/1458   Stans-debos-embosmal - Industrieel lijsten
6002/1467   Stansmallen - Banners
6002/1472   Stans-debossmal - Lang takje
6002/1474   Stans-debos-embossmal - No End Industriel rand
6002/1475   Stansmal - Industriele vlinder
6004/0039   Crafty Cocktail Bingo
6011/0575   Papierset - Noor - Men's world
6410/0526   Clearstempel - Tea Party
8089/0241   Kraftpapier Zwart

dinsdag 28 april 2020

Lang leve lieve jij

Hallo allemaal :)

de nieuwe collectie 4 van Joy!Crafts is uit en wat zitten er weer gave spullen tussen :D
vooral het thema industrial is helemaal mijn ding omdat je het weer zo gaaf kan verwerken
in steampunk en op mannenkaarten.

Vandaar dus deze creatie vandaag van mijn hand:
een stoere verjaardagskaart voor een man:


Voor de basiskaart heb ik het zwarte kraftpapier van JoyCrafts gebruikt.
Het gave designpapier Men's World is ook weer verkrijgbaar :)


Alle stencils heb ik een roestig uiterlijk gegeven,
dat staat natuurlijk vreselijk stoer :)


ik ben weer helemaal happy met deze lijn en zal hem zekers vaker gaan gebruiken.


Dankjewel voor je bezoekje en tot de volgende x :)


gebruikte materialen:
6002/1458   Stans-debos-embosmal - Industrieel lijsten
6002/1467   Stansmallen - Banners
6002/1473   Stans-debossmal - NoEnd - Industrieel hoek
6002/1474   Stans-debos-embossmal - No End Industriel rand
6002/1475   Stansmal - Industriele vlinder
6011/0575   Papierset - Noor - Men's world
6410/0526   Clearstempel - Tea Party
6500/0034   Lijmvellen A5 - Snel en Schoon
8089/0241   Kraftpapier Zwart

woensdag 24 juli 2019

Tafeldecoratie Schelp

Hallo allemaal :)

Wisten jullie al dat Joy!Crafts ook hele leuke houten figuurtjes
 en plastic transparante figuren heeft in het assortiment?

Ik heb deze keer de transparante schelp omgetoverd tot een gave steampunk decoratie :)


Als bodem( basis) heb ik een ronde woodster gebruikt ( de grootste) 
en daarop een mooie cirkelstans geplakt, daarna de schelp vastgezet zodat alles mooi blijft staan.


Ook mocht de flessenpost natuurlijk niet ontbreken :P 


Bij een schelp horen natuurlijk ook wat waterdruppeltjes


de mooie libelle mocht ook niet ontbreken, tis 1 van mijn favoriete insecten en past geweldig bij een steampunk thema :)

Dankjewel voor je bezoekje en tot de volgende x :)


gebruikte materialen:
6211/0002 - Transparante schelp
6320/0001 - Houten Cirkels
6002/1293 - Snij-embosstencil - Libelle 6002/1293
6320/0005 - Woodsters - Figuren hout: anker - reddingsboei - stuurwiel
6320/0003 - Woodsters - Houten figuren - Zeester- schelp- vis

woensdag 29 oktober 2014

Time to say goodbye from HC

Today is my final card for the Heartfelt Design team.It's time to say goodbye but I hope I'll be back on the team again some day :)


Project Instructions:
Other Products: Vintage photo distress ink, red and grey cs, glue, hot glue gun, heat gun, spectrum noir markers, ribbled cardboard, bandage, embellishments, ribbon.

Instructions: Create a base card 5"x 9" from red cardstock. Cut a smaller piece of grey cardstock, distress and ink the edges with vintage photo distress ink. Cut another smaller piece of the all geared up collection and distress and ink the edges. Also cut a small piece of aqua cs for the left side and ink the edges. For the die cut in the center I used the HCPC 3634 stamp. I tried to match the colors with the papers I used for the dies I created with the all geared up die. The stamp was colored with spectrum noir markers. Now you can adhere all your layers and decorate with wooden embellishments and/or other embellishments.

woensdag 22 oktober 2014

Heartfelt Creations Wednesday and time to say goodbye

Here's my steampunk DT card for this week using the All Geared Up Collection.I really love this collection :))

It is also time to say goodbye from the Heartfelt Design Team.I was honoured to be part of that team for a year, they made it possible to let us create the most wonderful projects with their gorgeous products.I sure hope I'll be part of the team again some day! :D
Ofcourse I will continue creating projects and stuff for my blog so don't worry :)


Products Used:
All Geared Up Die
All Geared Up Paper Collection
Classic Sunflower Die
Paper Blossoms Molding Mat
Paper Blossoms Tool Kit
Gold 3D Stamp Paint
Lime Green Metallic 3D Stamp Paint
Copper 3D Stamp Paint

Project Instructions:
Other Products: Vintage photo distress ink, dark brown cs, glue, hot glue gun, heat gun, brads.

Birthday Blessings Instructions: For this card take any shape you like and use 3 different sizes for the papers. The base is just brown cardstock, the middle paper was made using the self adhesive aluminum tape smeared with black acrylic paint (then wipe it off with a tissue). The smallest piece is from the All Geared Up Paper Collection. To create the metallic look, I used self adhesive aluminum tape again on cardstock (smeared with black acrylic paint, then wipe it off with a tissue) then I die cut several cogs and the chains from the All Geared Up Die and sunflowers from the Classic Sunflower Die. I used several colors from the viva 3d stamp to create that old rusty look. I just used my fingers to smear the dies. The chains were put together by making a small cut and then glued them. Choose 2 small die cuts from the Geared Collection and ink the edges. Now you can decorate your card with all the nice "metallic" parts you just created :)

woensdag 15 oktober 2014

Heartfelt Creations Wednesday again plus Blog Hop :)

Here's my DT card for this week plus we are having a blog hop with  Really Reasonable Ribbon  :D


Project Instructions:
All Geared Up Note
Other Products: Vintage photo distress ink, grey, brown and green brown cs, glue, hot glue gun, heat gun, ribbons and lace from Really Reasonable Ribbons.

Instructions: Create a base card 5" x 9" from grey cardstock. Cut a smaller piece of the Geared Up Paper Collection, distress and ink the edges with vintage photo distress ink. Die cut 3 sizes from the Spellbinders Gold labels 4 Die in 3 different colors and ink the edges. For the front panel I used the Nuts and Bolt stamp, coloured with spectrum noir markers. The gears and flowers are made of aluminum tape again, smeared with viva 3d paint colors. The ribbons are made with the mini bowdabra.

woensdag 8 oktober 2014

New Collection All Geared Up is here! :))

I just love this new collection from Heartfelt Creations since I adore to make vintage and steampunk projects. This collection is perfect in any way :))

Here's my DT card for this week:


Project Instructions:
Metallic Nuts And Bolts
Other Products: Vintage photo distress ink, dark and light brown cs, glue, hot glue gun, heat gun, 3d foam pads.

Instructions: Create a base card 5" x 9" from dark brown cardstock. Cut a smaller piece of the Geared Up Paper Collection, distress and ink the edges with vintage photo distress ink. Cut a triangle from light brown cardstock and ink the edges. Cut a somewhat smaller triangle from the Geared Up Paper Collection and distress and ink the edges. To create the metallic, look I used self adhesive aluminum tape on cardstock then I die cut several cogs and the chains from the All Geared Up Die. I used several colors from the viva 3d stamp to create that old rusty look. I just used my fingers to smear the dies. I did the same thing for the tag on the left. The chains were put together by making a small cut and then glued them. Now you can adhere everything to your card. For the old effect I also smeared some rusty viva 3d stamp on several spots.

donderdag 2 oktober 2014

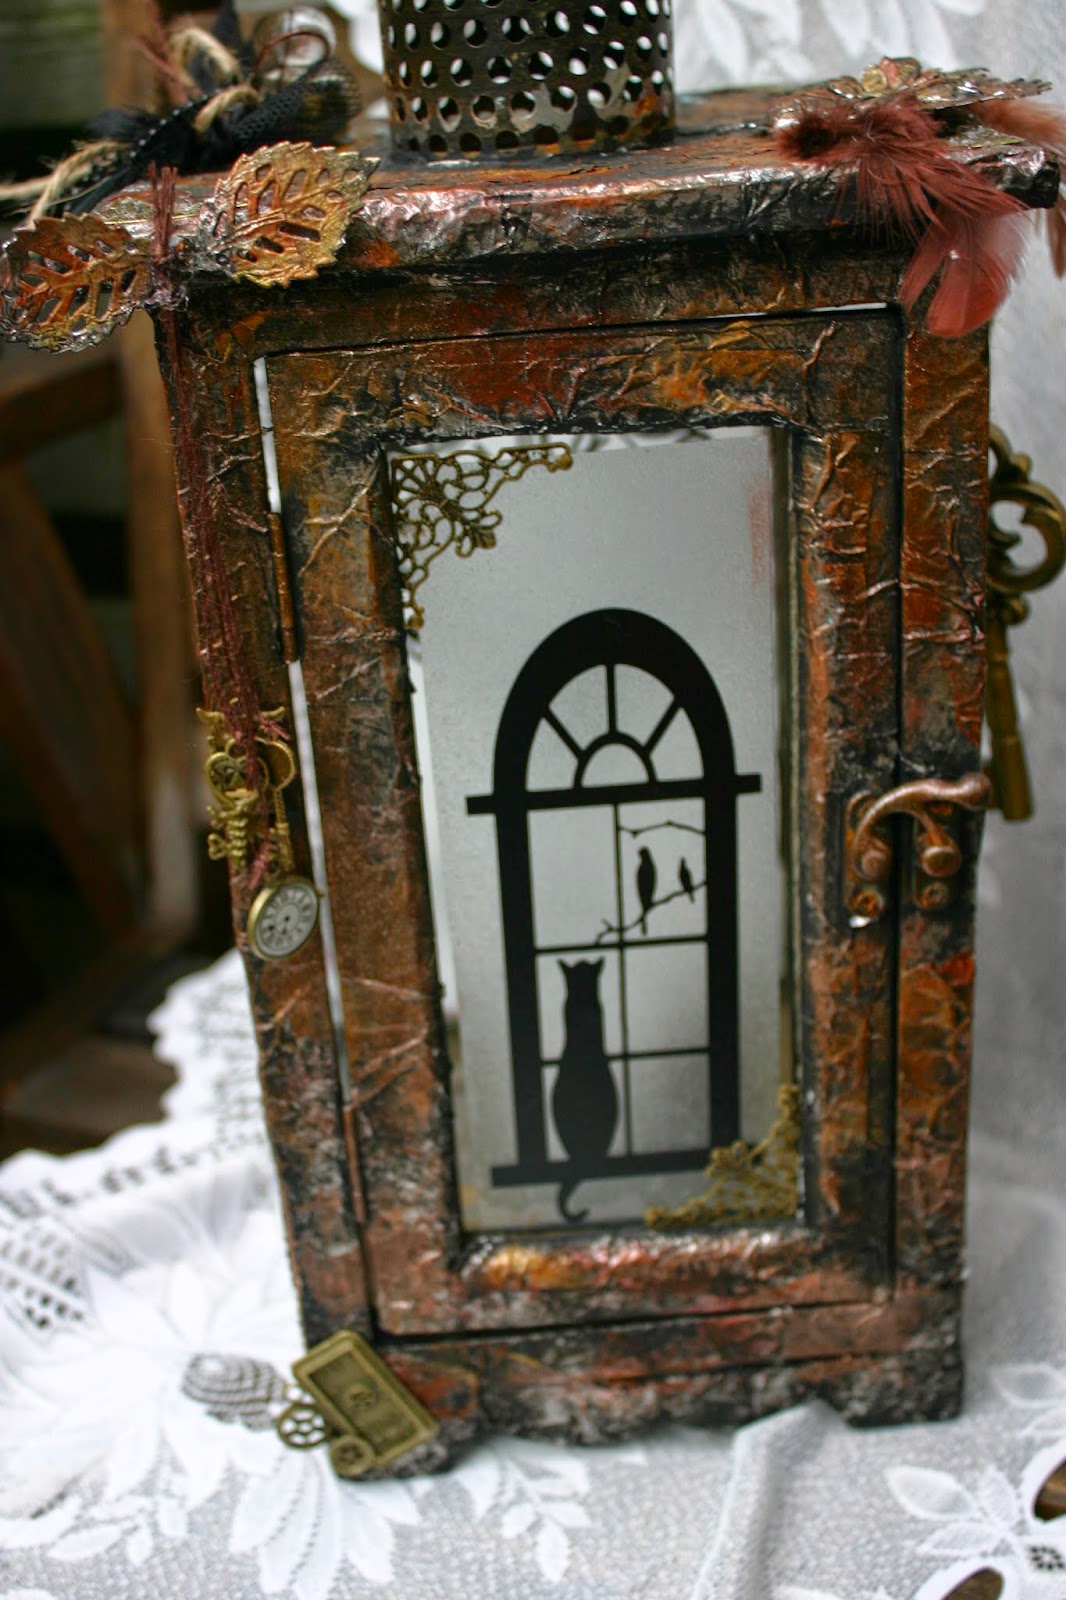
New Steampunk project: altered lantern :))

about 2 weeks ago I got this old wooden rusty lantern from a friend and the minute I saw it I knew what to do with it :))  create a steampunk lantern so here's the result :)


zondag 7 september 2014

“Sept IARDC”

Wit this altered steampunk coffeemill I am joining the I Am Roses challenge with this month's theme: steampunk :)))  one of my favorites  :D


vrijdag 25 oktober 2013

Steampunk hat in XMAS style :)

After the succes of my first Steampunk hat which was sold within 5 minutes I decided to create a XMAS version:)  still have 4 more to go to create :)


the second XMAS hat