Posts tonen met het label gift. Alle posts tonen

woensdag 5 maart 2014

Explosion of Inspiration at Heartfelt Creations :)

This time I wanted to honor my fellow Design Team members at Heartfelt Creations. 
They all make so many stunning projects!!


Products Used:
HCPC 3551 Holly Berry PreCut Set
HCD 738 Ornamental Add On Die
HCD 726 Delicate Asters Die
HCPC 3494 Delicate Asters PreCut Set
HCDP1 240 Raindrops on Roses Paper Collection
HCD 743 Raindrops on Roses Die
HCPC 3587 Raindrops on Roses Window PreCut Set
HCPC 3584 Lady Rosalie PreCut Set
HCD 742 Majestic Blooms Die
HCPC 3578 Majestic Morning Background PreCut Set

Project Instructions:
Other Products: Brown and creme cardstock, vintage photo distress ink, hot glue gun, flatback acryl hearts, lace, bandage, black memento ink, glue.

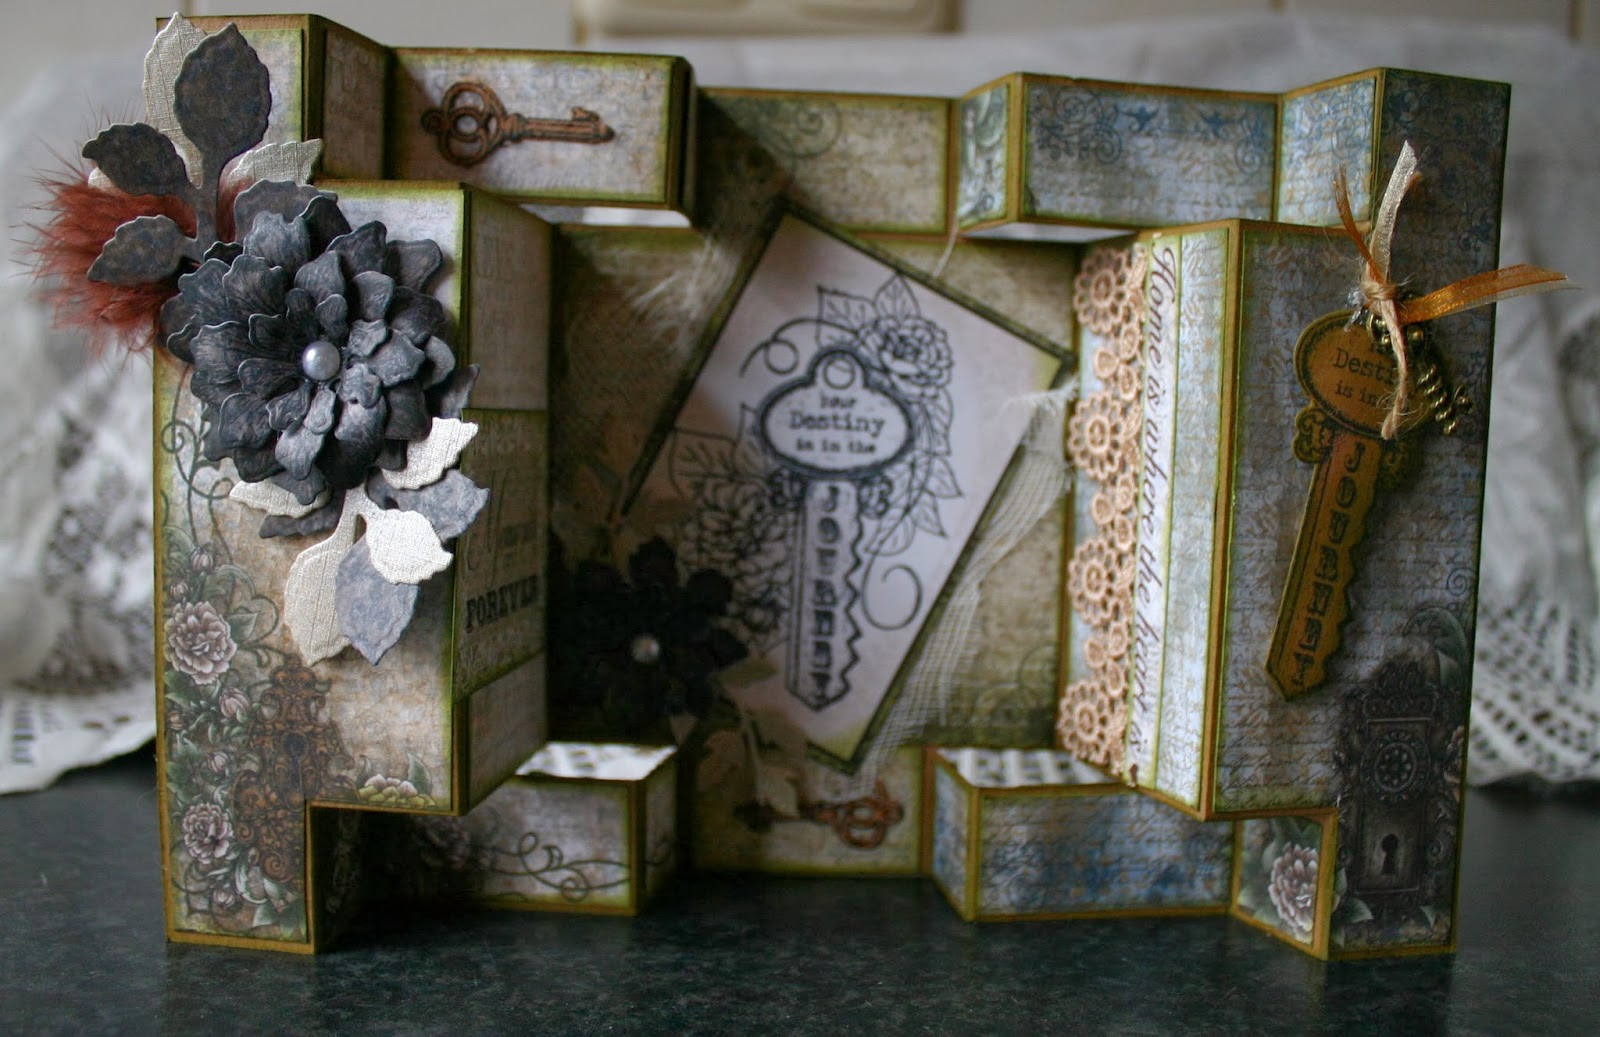
Delicate Asters Exploding Box Instructions: You can follow these instructions to make your own beautiful exploding box. I had found another tutorial but can not remember where. Of course you can choose how big or small you want your exploding box to be. This is a link for those who like inches better. Before I layered and glued the 3 cross shapes I decorated them first on all sides with the Raindrops on Roses Paper Collection, and of course you should know by now I inked all the edges with vintage photo distress ink. For decoration you can use of course all kind of images, stamps and/or photos, I wanted to surprise my DT members with their photos in this exploding box. I added some bandage underneath the photos and yes I even inked all the edges of the photos. For the corners, I cut the doily from the Raindrops on Roses Die and cut it in 4 parts and placed them in the corners. For the center of the box, I used the Lady Rosalie PreCut Set. Add a flatback acryl heart in each corner for the finishing touch. The lid has been decorated with lace, a die cut with text from the Raindrops on Roses Paper Collection and flowers made with the Delicate Asters Die and Delicate Asters PreCut Set. The leaves are from the Ornamental Add On Die and the Holly Berry PreCut Set.

vrijdag 29 november 2013

2 DT projects with the Floral Key Collection :)


Project Instructions:
Other products: brown Card stock (CS), peeled paint distress ink, hot glue gun, flatback pearls, lace, cutting knife

Instructions: Cut a 30 x 15 cm piece of brown cardstock and follow the instructions of folding and cutting from the template. Sponge the edges with peeled paint distress ink. I have used 3 paperpads from the Floral Key Paper Collection. First one was cut in pieces and added to the right side of the card. Second one was cut in pieces and added to the left side and the third one was used for the center of the card. Choose a die cut from the Floral Key Paper Collection, use the key stamp from the Journey of Love Keys PreCut set and adhere it to the center of the card front with some bandage beneath the die cut. Choose another die cut from the Floral Key Paper Collection and add it to the left of your card. I also cut the text "home is where the heart is" and put it on the right with some nice lace ribbon. Cut and emboss 4 Classic Leaf Dies and place them under your flowers. Cut and emboss from the Tattered Blossoms Die some flowers, ink it with Tattered Blossoms PreCut Set and glue the flowers in layers and add a flatback pearl in the center. From the Burnished Key Die Set I used 2 small keys and the bigger one and placed them on the card. Add some cute key embellishment with ribbons and you are done.


Project Instructions:
Other products: ribbed cardboard, vintage photo distress ink, hot glue gun, flatback pearls, lace, button, feathers, ribbon

Instructions: Use a paper gift bag. Sponge the edges with vintage photo distress ink. Choose 2 nice papers from the Floral Key Paper Collection and cut them in the right size to fit your bag. Use one for the front and one for the back. I have distressed the edges of the front paper with my 3D scissor. Ink all the edges with vintage photo distress ink. I folded the right corner of the front paper and glued it. Also cut a small piece of ribbed cardboard and place it under your front paper in the right corner and put a button on it. Choose a die cut from the Floral Key Paper Collection, use the key stamp from the Journey of Love Keys PreCut set and adhere somewhere where you like it. with some bandage beneath the die cut and add a cute lace ribbon on the bottom of the die cut. Choose another die cut from the Floral Key Paper Collection and add it also on your bag. I placed a cute little key embellishment on it.Vintage Wish Gift Bag The bows on top of the bag was made with several lace, 2 feathers and ribbons using the mini bowdabra. Cut and emboss 5 layers of the Vintage Floret Die, ink it with Vintage Floret PreCut Set and add glue them together. Cut and emboss 2 small flowers from the Tattered Blossoms Die, ink it with Tattered Blossoms PreCut Set and glue the flowers.

woensdag 28 augustus 2013

windmolen/ windmill

Op het moment dat dit patroon uitkwam bij Sandra's Scrapsels wist ik het gelijk..................die moet ik maken! het heeft even geduurd maar hier is dan eindelijk het resultaat na 3 dagen werk. aangezien ik geen silhouette machine heb moest ik alles zelf uitsnijden en knippen pppffffffff.heel veel werk maar ben er wel blij mee. :)


veel materiaal van noor design gebruikt. dat papier blijf ik echt geweldig vinden. zooo mooi :)

bedankt voor het kijken en tot de volgende keer:)